Baseboard Installation Toronto: Cost Factors, Materials and Process
Plan baseboard installation in Toronto with clear material, removal, wall and floor preparation, finishing, sequencing and estimate details.
Baseboards create the finished transition between walls and flooring, but they also reveal uneven surfaces, awkward corners and rushed preparation. A clean result depends on accurate measurements, a profile that suits the room and a scope that includes the right finishing steps.
This guide explains what Toronto homeowners should consider when replacing or installing baseboards. For project-specific help, review PReno’s trim and baseboard service or request a free estimate.
What Is Included in Baseboard Installation?
“Install baseboards” can describe several different scopes. A complete proposal should clarify whether it includes:
- removal and disposal of existing trim;
- protection of flooring, furniture and access routes;
- minor wall-edge preparation after removal;
- supply or installation of the selected baseboard;
- outside corners, inside corners, returns and transitions;
- filling nail holes and small joints;
- caulking the top edge where appropriate;
- priming cut ends or unfinished material;
- one or more finish-paint stages;
- final touch-ups and cleanup.
A quote for installation-only should not be compared directly with one that includes removal, material, caulking and painting.
Choosing a Baseboard Material
MDF
Medium-density fibreboard is available in many consistent profiles and is commonly used for painted interior trim. It cuts cleanly and has no natural grain, but exposed edges and damaged areas need suitable preparation. It is not the right choice for every moisture condition.
Finger-jointed or solid wood
Wood products can be painted or, depending on species and grade, finished to show natural grain. Material movement, knots, grain and cost vary. The installer should know the intended finish before cutting and filling.
PVC or other moisture-tolerant trim
Synthetic trim may be considered in locations where moisture exposure makes standard interior products less suitable. Adhesives, fasteners, joints and paint compatibility should follow the product requirements.
Matching existing profiles
Exact matches can be difficult in older homes, especially after years of paint buildup or when the original millwork is no longer produced. Options may include matching height and general style, using custom milling, replacing one complete room or creating a deliberate transition.
Choose Height and Profile With the Whole Room in Mind
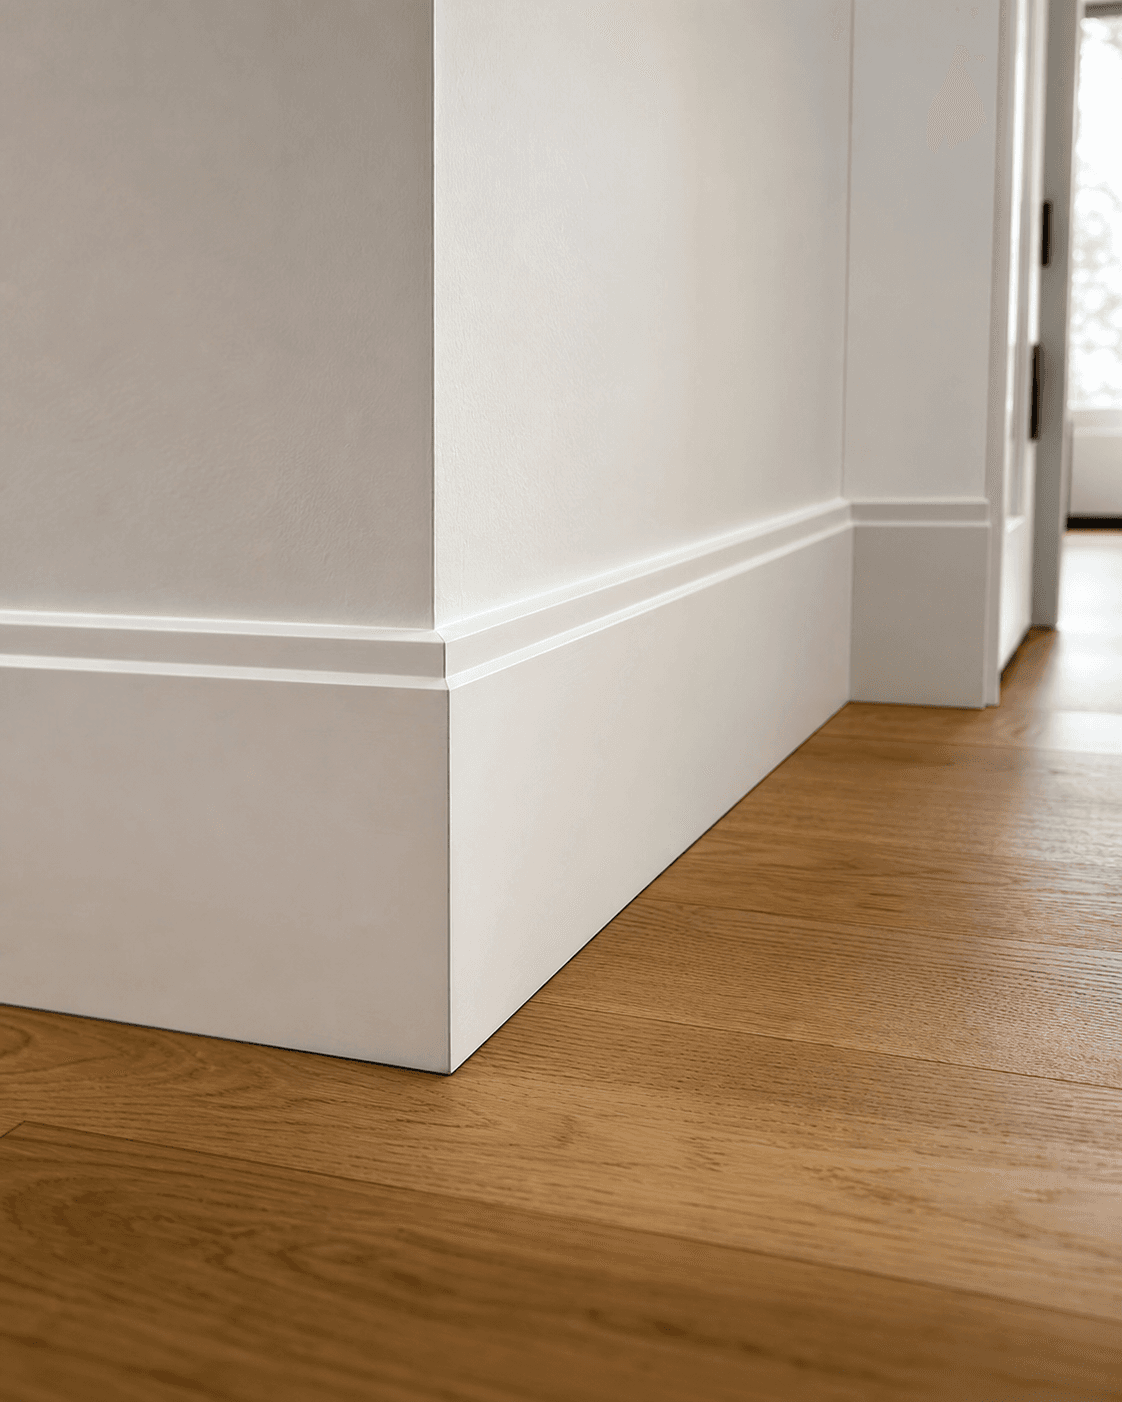
Baseboard height should relate to ceiling height, door casing, wall proportions and the style of the home. A larger profile can look substantial, but it may conflict with low outlets, vents, built-ins, stair details or short door casing blocks.
Bring a material sample into the room and check:
- how it meets door casing;
- whether the cap or detail aligns at corners;
- clearance at vents, radiators and cabinetry;
- how it transitions to existing trim in adjacent rooms;
- whether the profile leaves enough flat area for fastening and filling;
- how the selected paint sheen will show joints or surface imperfections.
Should Baseboards Be Installed Before or After Flooring?
Baseboards are commonly installed after the finished flooring so their bottom edge can be coordinated with the actual surface. However, the correct sequence depends on the flooring system, manufacturer requirements and overall renovation plan.
Floating floors need the required perimeter movement space. Baseboard or shoe moulding may conceal that gap without restricting the floor. Tile, hardwood, vinyl and carpet each create different edge and height details.
If flooring is also changing, define responsibility for:
- removal and reinstallation of trim;
- wall damage caused during removal;
- required expansion gaps;
- shoe moulding or quarter round;
- transitions between different floor heights;
- final caulk and paint touch-ups.
Compare common materials in the floor installation options guide or review PReno’s flooring installation service.
The Baseboard Installation Process
1. Measure rooms and count details
Linear footage is only the starting point. The installer also records inside and outside corners, door openings, stairs, closets, returns, transitions, vents and areas where furniture or built-ins limit access.
2. Confirm the profile and finish system
Material, height, length, primer and paint should be selected before installation. Longer stock can reduce joints but may be harder to deliver through elevators, stairwells or tight condo corridors.
3. Protect and remove existing trim
Where removal is included, the caulk and paint line is controlled before the old trim is lifted. Even careful removal can reveal torn paper, old adhesive, uneven drywall or flooring gaps that were hidden.
4. Prepare the wall edge
Loose material, large paint ridges and damage that would prevent the trim from sitting correctly are addressed according to the scope. Baseboard follows the wall; it cannot make a severely bowed surface straight.
5. Cut, fit and fasten
Corners and joints are fitted for the actual room, not assumed to be perfectly square. Fastening locations should suit the wall construction and profile while minimizing visible damage.
6. Fill, caulk and paint
Nail holes and appropriate joints are filled, sanded and checked. A controlled caulk line can close small top-edge gaps, but excessive caulk is not a substitute for fitting or wall repair. Priming and finish coats should match the agreed material and paint system.
7. Inspect transitions and touch-ups
Review corners, door casings, flooring edges, paint lines and rooms under normal lighting. Confirm whether wall touch-ups beyond the trim line are included.
What Affects Baseboard Installation Cost in Toronto?
The final price depends on the details of the work. The most important variables are:
| Cost factor | Why it changes the scope |
|---|---|
| Linear footage | Drives material quantity and installation time |
| Profile and material | Changes product cost, cutting, handling and finishing |
| Removal | Existing caulk, paint, nails and adhesive affect labour and wall repair |
| Corners and transitions | Detailed rooms take longer than straight open runs |
| Wall and floor condition | Gaps, bows, uneven floors and damaged drywall require decisions |
| Stairs and access | Stair trim, elevators, parking and occupied rooms add setup |
| Finishing | Filling, caulking, primer and paint may be separate stages |
| Furniture and protection | Room readiness affects movement and working space |
When requesting an estimate, send the property location, room photos, approximate linear footage, preferred height or profile, and whether old trim must be removed. Note if the flooring is new, existing or scheduled to change.
Can Existing Baseboards Be Reused?
Reuse may be possible when material is in good condition and the profile is worth preserving. It should not be assumed, because boards can split during removal, mitres may not fit a changed room and old nail holes or paint buildup can require significant refinishing.
If reuse is important, identify it as a project goal and decide how damaged pieces or shortages will be handled before removal begins.
Does Baseboard Installation Need a Toronto Building Permit?
The City of Toronto currently lists cabinetry and millwork among examples of work that does not require a building permit. The list is not exhaustive, and related structural, electrical, plumbing or other renovation work can have separate requirements. Check the current City building permit guidance for the complete project scope.
Common Baseboard Mistakes to Avoid
- Ordering only exact measured footage with no allowance for cuts or defects.
- Choosing a profile before checking casing, vents and built-ins.
- Assuming walls and corners are perfectly straight or square.
- Installing before the flooring sequence is confirmed.
- Hiding large gaps with excessive caulk.
- Skipping primer on exposed or repaired material.
- Leaving wall repair and paint responsibility undefined.
- Comparing an installation-only price with a finished and painted scope.
Baseboard Estimate Checklist
Provide these details for a more useful quote:
- property location and type;
- rooms and approximate linear footage;
- photos of current baseboards, corners and floor edges;
- selected material, height and profile if known;
- whether PReno supplies the trim;
- removal, disposal and reuse expectations;
- flooring status and transition details;
- whether filling, caulking, primer and paint are included;
- condo access, parking, elevator and work-hour rules;
- timing relative to flooring and painting work.
Request a Toronto Baseboard Installation Estimate
PReno installs baseboards and interior trim as part of focused finishing work and broader renovations across Toronto and the GTA. View the trim work service, explore completed projects or send photos and project details for a free estimate.
Common questions
Frequently asked questions
What affects baseboard installation cost in Toronto?
Cost depends on linear footage, profile and material, removal, wall and floor condition, number of corners and transitions, stairs, access, caulking, filling, priming and painting.
Should baseboards be installed before or after new flooring?
Baseboards are commonly installed after the finished floor so the height and bottom edge can be coordinated with the actual surface. The correct sequence depends on the flooring system and project scope.
Can existing baseboards be reused?
Sometimes, but removal can split material or damage profiles, especially where caulk and paint bridge the trim to the wall. Reuse should be evaluated before it is assumed in the scope.
Ready to Start Your Renovation?
Get a free quote from PReno Construction and bring your vision to life with our expert team
Get Free Quote